
Create the perfect camo for your favorite hunting conditions. Ready to get started? After you click the link below, our Invisible Sportsman customization builder will walk you through the process of creating your ready to wear, one of a kind, full body custom camo. Before you get started, be sure to review the steps below to make sure you have everything you'll need for the process.
Here's how the Invisible Sportsman Custom Camo Builder will look.
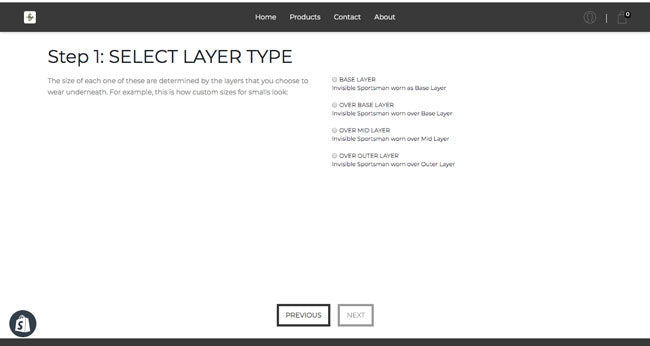
How will you be wearing your customized camo? Will you have layers on under your custom camo, OR will you be wearing it as a single layer? Your custom camo will stretch a bit, but be sure to select the layer that you will primarily be utilizing.
Take a photo of the area you want to blend into. DO NOT zoom or use a flash. Use the highest resolution settings that your phone or camera will allow. Do not compress or shrink the size of the photo.

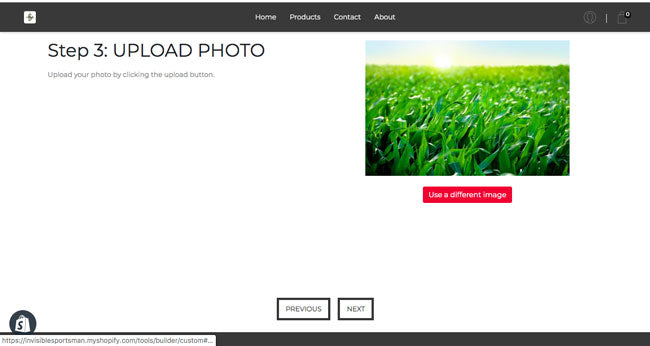
Upload your image from your mobile device or computer by clicking the "upload" icon to browse your device.

Allow a few minutes to pass while your image uploads. Keep in mind that the larger the image, the longer it may take and quality will be better. Once your image has uploaded, a small preview of the image you uploaded will display:
If you're not happy with the image you uploaded, simply click the red button and select a different image from your device.
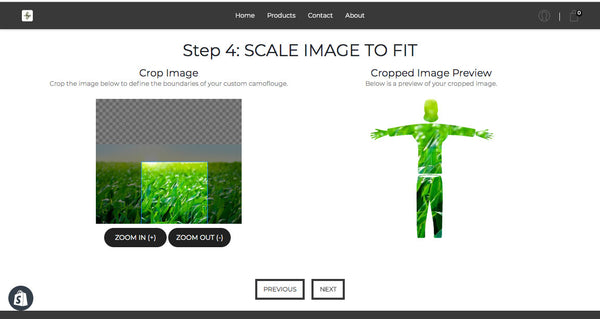
On the right side of your screen, you'll see your image and a selection box. On the left side is a figure, which represents the custom camo print relative to your final size. You can move the selection box, zoom in or out, and manipulate the area to customize your camo. You know best your body relative to the objects in the photo. Modify the image to find the best look to correspond your height with the terrain you'll be hunting in.
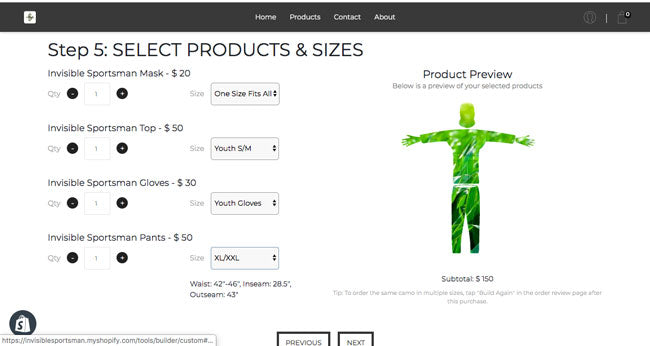
You know best how you're going to wear each item of your camo and whether the camo will be your base layer, outer layer, etc. Keep the layer type in mind while selecting your sizes.
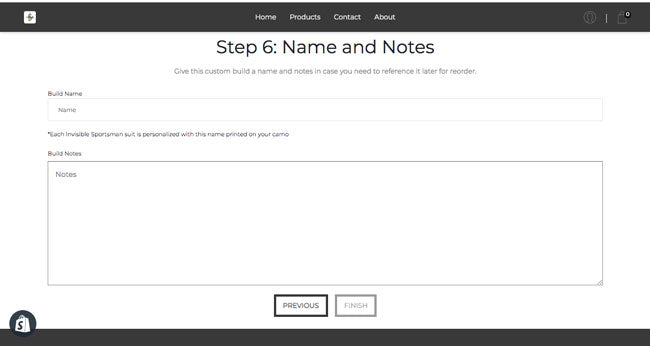
This camo is being custom created by you and for you; so, give it a name! This can be something as simple as "Summer Corn" or complicated as "Smith Family Outing." It's up to you! Brand Names are limited to 180 characters.
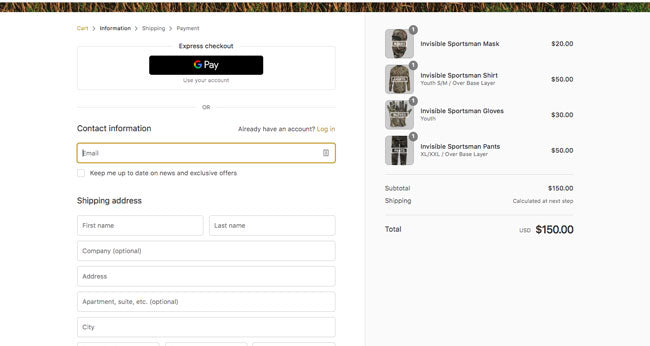
Give your order one final review. Once you enter payment and shipping information, you're done! Upon receiving your order submission, a staff member will review your order and your pattern photo and start processing your custom camo. You'll receive by email your confirmation and receipt.
Need to reorder? Not a problem! Log into your account on Invisible Sportsman and select the order number or Brand Name of your past purchase. Then, click the "Re-order" button. It's that easy.
READY?
$132.00